Getting Started - Sale

Mike Jackson
Last Update há 2 anos
Using new software can be overwhelming. This walkthrough will get you through the basic elements of a sale matter. If at any point, you get stuck, we’ve linked related articles at the bottom of this article. You can also reach a live person with knowledge of conveyancing and Prolegis via our instant chat at "We Are Here."

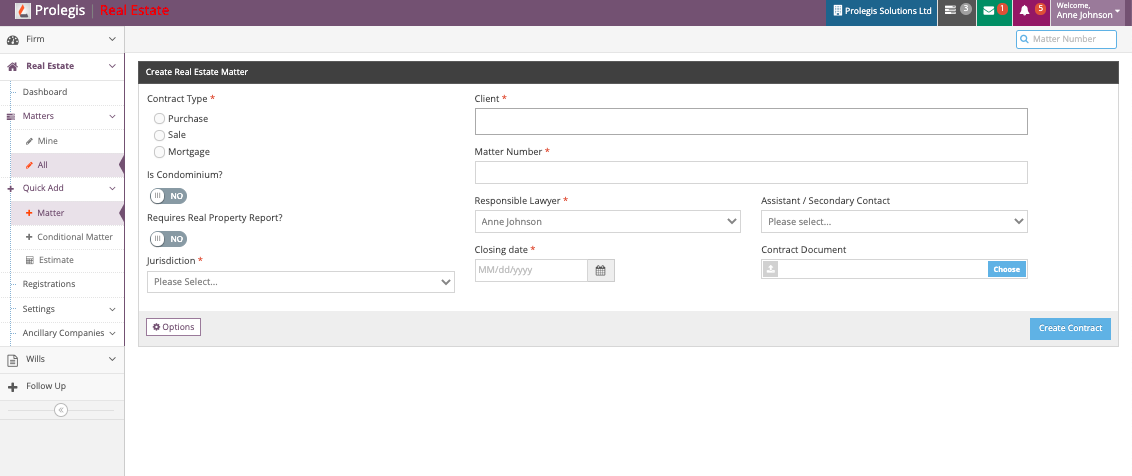
Open a new matter with “quick add” under the matters tab on the left-hand side of the screen.
Enter the data that you have available and select the type of deal. Click on Create Contract on the bottom right corner of the box to create the matter.
The Actions menu is your tool for data entry. When you enter the matter the Actions menu will always be available in the top right hand corner of your screen. When you click on the Actions menu button, the menu options will appear.
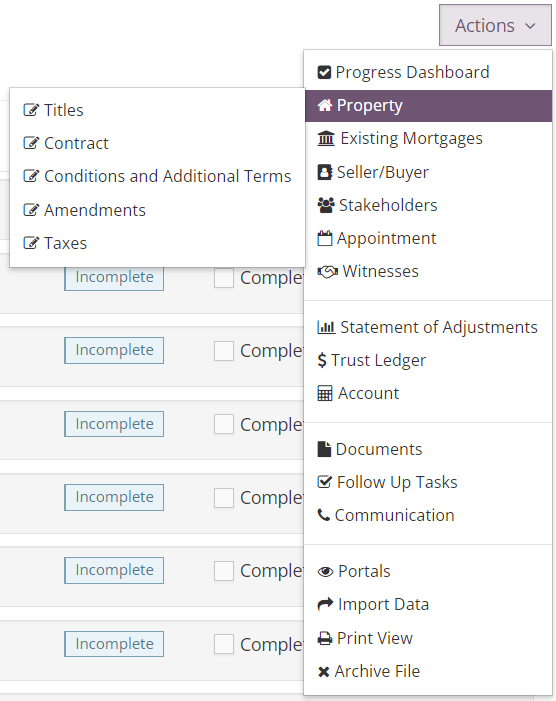
The top half of that menu is primarily used for data entry with the exception of the Progress Dashboard, which is the checklist. The top half of the menu has sub-menus that will appear when you hover over them.
For a sale matter, we recommend that you complete the data entry options by starting at the Property sub-menu and work your way down through each item. Ensure you are filling in as many fields as possible to benefit your workflow and the auto-population in your documents.
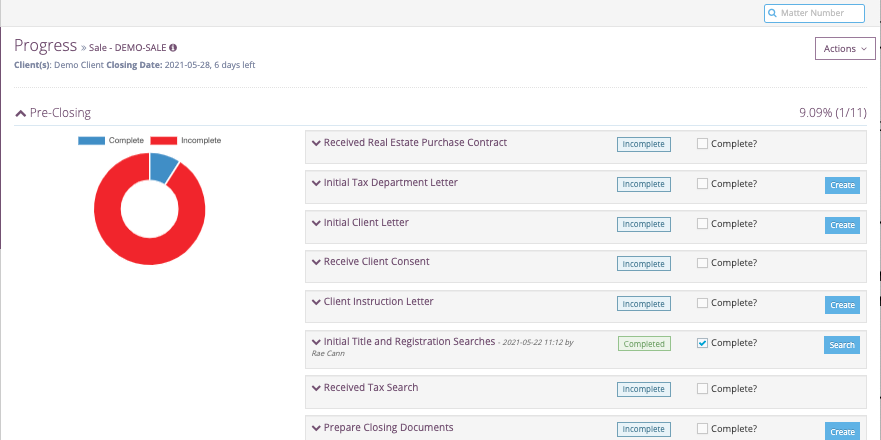
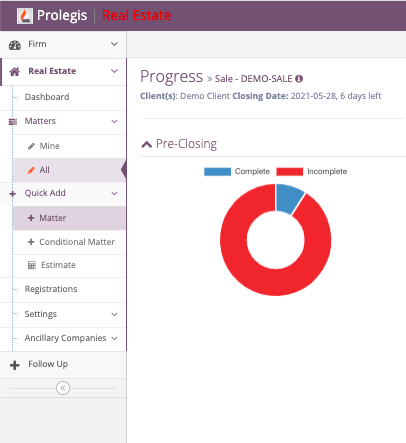
Once in the Progress Dashboard (your checklist), start from the top and work your way to the bottom. Any time you see a blue “Create” button on the right side of the screen, you are able to create the document that is related to that step.
If there is a document that needs to be generated and is not found on the progress dashboard, these can be found in the Actions menu under “Documents”. Once in the Documents Action, you will see a Precedents button, click it for a searchable menu of all available precedents in Prolegis for that matter type.